Below you will find the instructions for the Vertical Table plug-in
Contents
1. Introduction to the plug-in
1.3 Position in the overall software package
1. Introduction to the plug-in
The Vertical Table plug-in allows you to output the data from databases in vertical form.
This form of display is especially useful if a table contains a large number of columns and you want to display them clearly.
The Vertical Table plug-in allows you to display data from databases as well as queries.
You can feed the plug-in with complete databases as well as single tables, or you can display the output of your SQL queries.
By selecting multiple data sources, it is also possible to display several tables at the same time.
1.3 Position in the overall software package
The Vertical Table plug-in is part of the 4base module, which also contains the Database Definition and Table plug-ins.
Since the Vertical Table plug-in is assigned to the 4base module, it is available as a basic function in every SimAssist license package.
Since the Vertical Table plug-in is responsible for displaying data, it is related to all plug-ins that may also be involved in the data retrieval process.
These include:
•The Database Definition plug-in, which is responsible for connecting to databases.
•The SQL Expressions plug-in, which can be used to create SQL queries
•The Variables plug-in, which is used to create variables that can be used to further specify queries, for example.
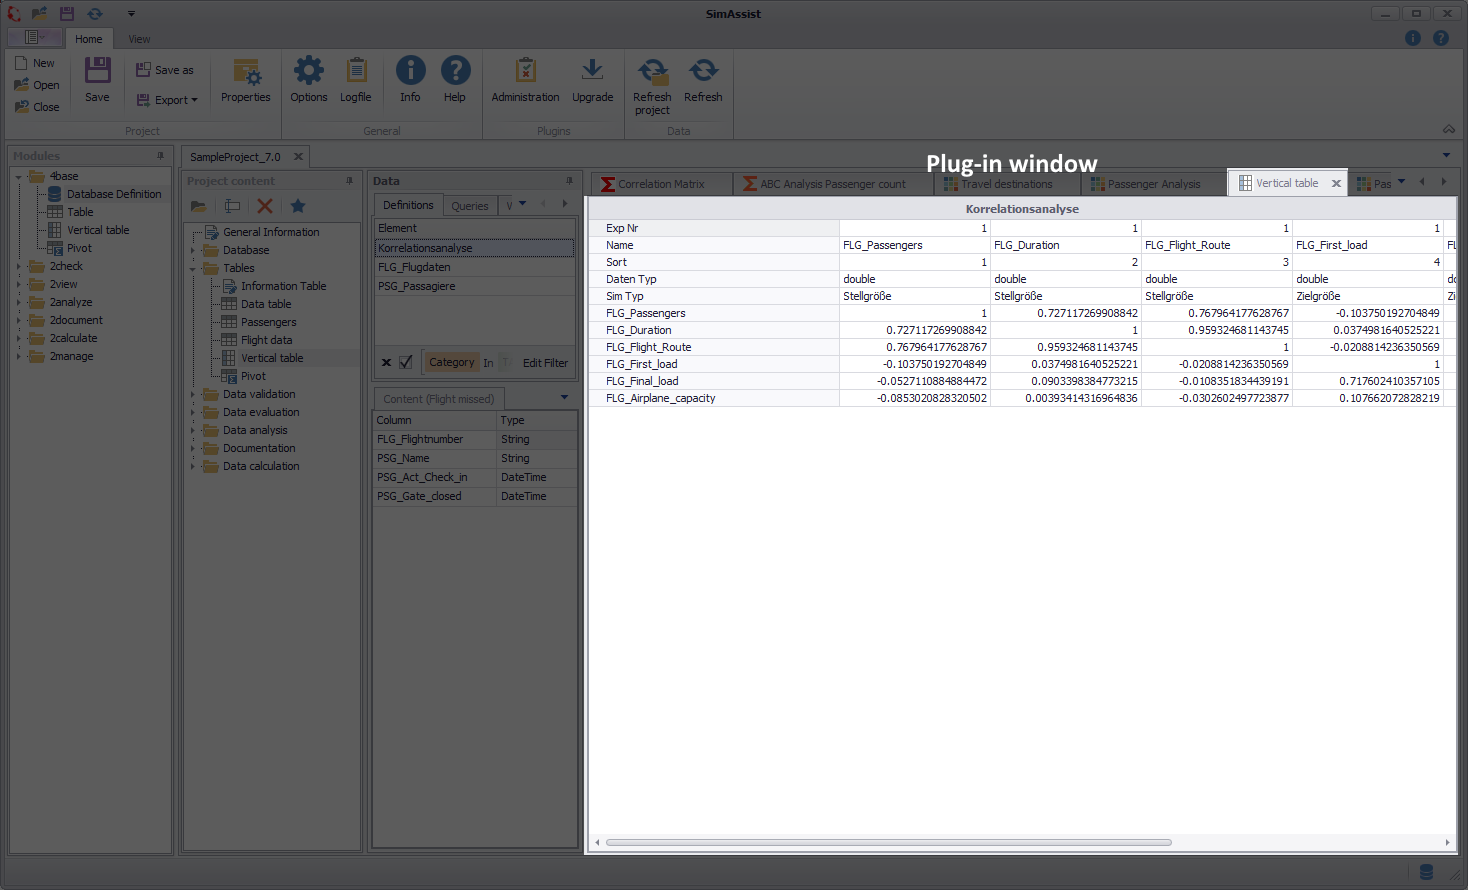
Figure 1 - Overview
The plug-in shows the connected table in vertical form. In the upper area of the plug-in window, the title of the connected table is also displayed.
To add data to the plug-in, select the desired source and add it to the target area (see Chapter Project data, section How to add data).
You can also add multiple data sources to the target area.
To do this, simply perform a multiple selection, for example by selecting several columns of a table, and then Drag&Drop them into the plug-in window of the Table plug-in.
You do not have to empty the Vertical Table before you want to display new data. You can simply drag the new data you want into the plug-in window and SimAssist will immediately update the display.
Moving columns also works via Drag&Drop. Simply drag the respective column to the desired position.

Figure 2 - Move Columns
The filter icon at the end of each row can be used to create and edit it. Depending on the data type of the row, different filters can be applied.

Figure 3 - Create Filter
Once a filter has been created and applied, it will be displayed in the footer of the plug-in window (see Figure 4):
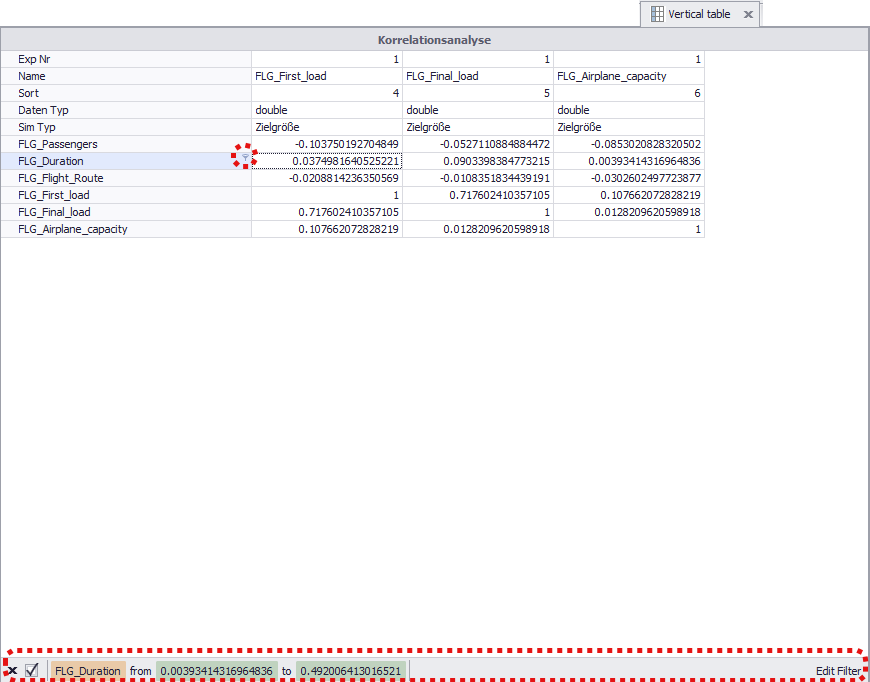
Figure 4 - Active Filter
The Edit Filter button can be used to edit filters that have already been created, but also to add new filters.
Details on this can be found in the Table chapter in the Editing Filters section.

Figure 5 - Edit Filter
Right-click on a row of the vertical table to open the context menu of the plug-in (see Figure 6). There you have - depending on the clicked column - different interaction options.
For example, you can sort the contents automatically, reset all sorting or determine the format of the row.
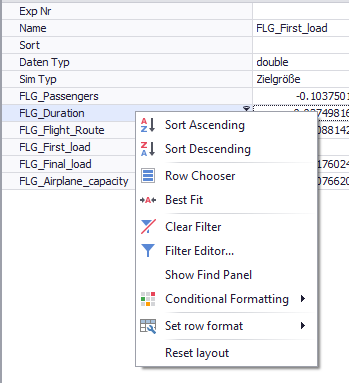
Figure 6 - Context Menu
The following table provides an overview of all context menu functions and explains them in detail:
Button |
Function |
||
|
Sorts the entire table content in descending order.* |
||
|
Sorts the entire table content in ascending order.* |
||
|
Opens the Customization window for the Row Selection which can be used to customize the column layout more conveniently. |
||
|
Adjusts the width of the current column to fit its content. |
||
|
Opens the Filter Editor window in which you can individually customize filters. |
||
|
Displays the Search function, which can be used to search the entire table content. |
||
|
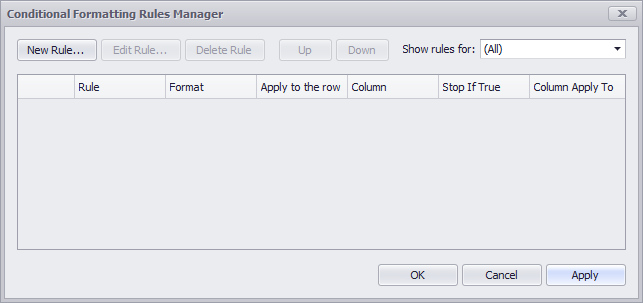
The content of the corresponding menu depends on the format of the column in which the context menu entry was selected. The following screenshot is displayed for the data type Double
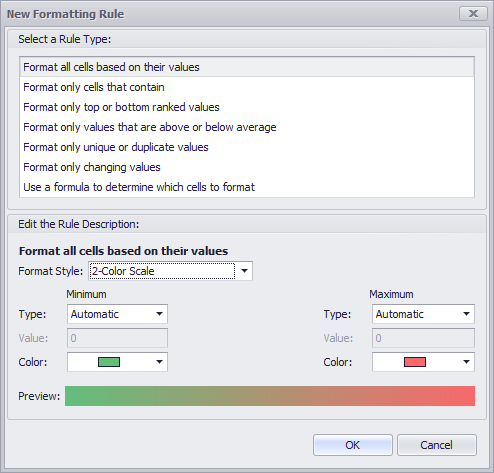
Clicking on Manage Rules... opens the following edit mode, where a number of rules for formatting the existing columns can be configured.
By clicking on New Rule this rule can be created.
Detailed information about this feature can be found here. |
||
|
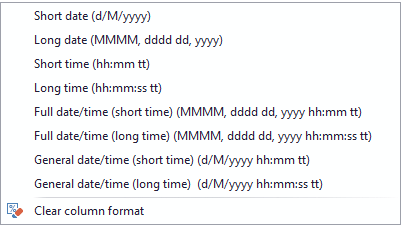
Defines the desired format of the corresponding column, either for Datetime or for Numeric columns
|
||
|
Restores the table layout to the original layout. |


© SimPlan AG - Hanau District Court, Commercial Register (Part B) 6845 - info@simplan.de - www.simplan.de/en