The following comprises instructions for the Variables plug-in.
Contents
1. Introduction to the plug-in
1.3 Position in the Overall Software Package
1. Introduction to the plug-in
The Variables plug-in enables you to, in many cases, further specify the data used in plug-ins during their use. This means that you can filter the data returned by databases in conjunction with SQL queries.
To specify the data you want to use when working with a plug-in not only on the basis of SQL queries, you can also define variables.
If desired, but you can use these variables as filter values exactly where you need them, in conjunction with SQL queries. You can create as many variables as desired.
1.3. Position in the Overall Software Package
The Variables plug-in is part of the 2check module, which also contains the Checking and SQL Statements plug-ins. Variables is available when you license the 2check module for SimAssist.
1.3.2. Links to Other plug-ins
The Variables plug-in is part of the 2check module, which also contains the Checking and SQL Statements plug-ins. Variables is available when you license the 2check module for SimAssist.

Figure 1 - Layout of the Variables plug-in
The menu is located at the top of the plug-in. Here, you can choose to create a new variable – in this case, the window for adding a new variable opens – or to edit or delete existing variables.
Any variables already created are displayed above the menu. All variables are displayed here in the form of a list, including specification of the relevant value(s).
The Variables plug-in menu contains the interaction areas required for adding, changing and deleting variables. The individual interaction options are presented below.
Button |
Description |
|
When you choose New, a window for adding a new variable opens. |
|
When you choose Edit, a window opens, in which you can edit the variable previously selected. In addition to the name, you can also change the variable values and choose OK to save your changes. |
|
When you choose Delete, the variable currently selected is deleted. |
First, you need to create one or several variables and to fill them with values.
As variables can be used only in conjunction with SQL statements, the next step is to create an SQL query using the SQL Statements plug-in.
To do so, proceed as usual, but leave one or more sections of the statement "blank":
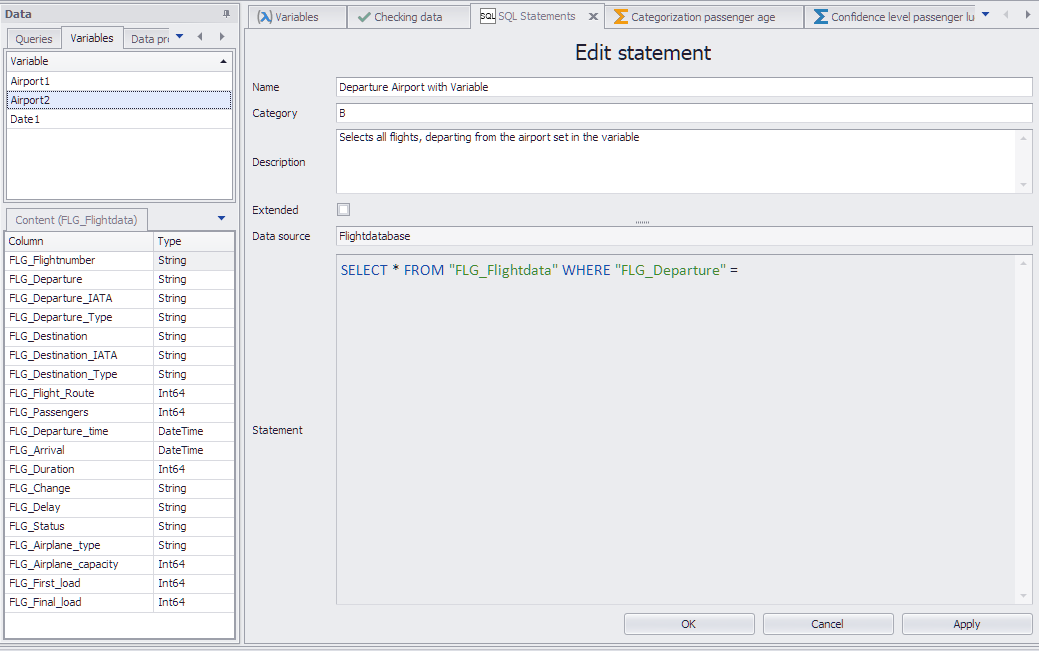
Figure 2 - SQL Statement
In the example in Figure 2, the definition of the content of the FLG_Departure column has, by way of an example, been left blank.
In the next step, you can move a suitable variable (ensure values and data types are meaningful) from the project data area to the SQL statement using Drag&Drop (see Figure 3).
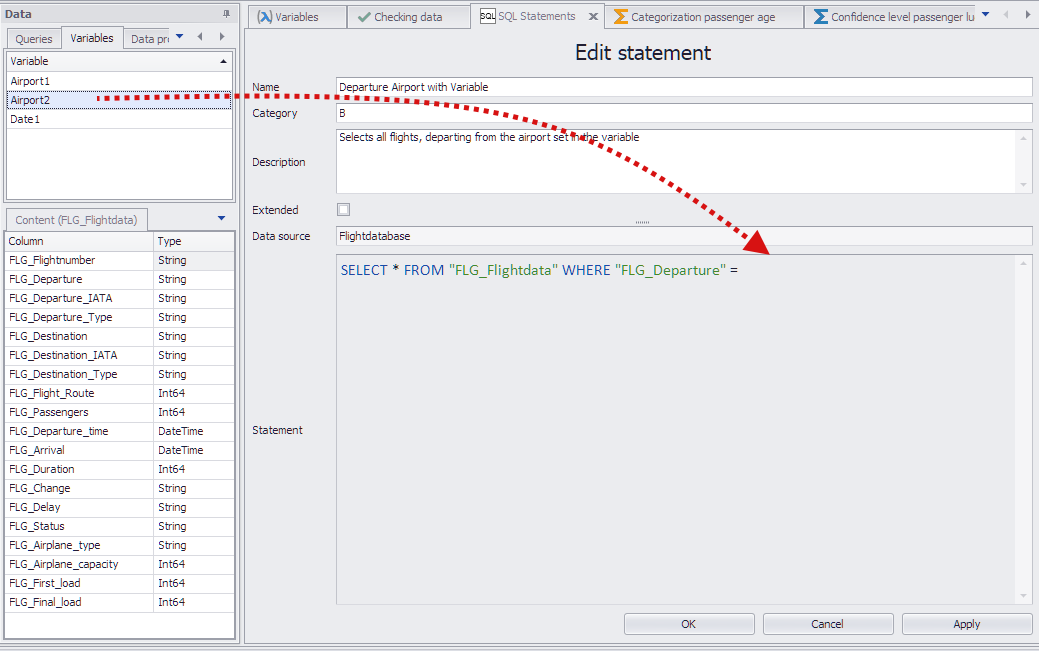
Figure 3 - Paste variables in SQL query
This links the variable with the SQL statement (see Figure 4).

Figure 4 - Linked variable
You can now use the SQL statement as usual in all plug-ins supported in SimAssist, whereby the variable content is always used as the column name.
If you now change the content of the variable, the SQL statement will also automatically change – this provides you with a very flexible way of specifying your data queries.
You can, of course, not only replace column names with variables, but also, for example, database names, or even SQL statements like WHERE.
The following table provides examples of how to define SQL queries so that variables can be used in them:
The word String, Number and Day is shown in the examples for the respective variable, the quotes belong to the SQL query.
In general: Text variables are enclosed with ' ' , column names enclosed with " " .
Datatype |
Database |
||
Oracle |
Access |
SQLite |
|
Text |
TEXT = 'String' |
TEXT = 'String' |
|
Number |
VALUE = Number, "language independent" |
VALUE = Number, "language independent" |
|
Date |
TIMESTAMP >= TO_DATE('Day', 'MM/DD/YYYY HH24:MI:SS') "language independent" |
TIMESTAMP >= CDATE('Day') "language-dependent" |
Use text variables in any of the following formats: YYYY-MM-DD HH:MM:SS.SSSSSSS or YYYY-MM-DD HH:MM:SS |
In order to meet the characteristics of the different databases, a new property is added to the variables:
The output format defines the format settings the language-independent stored values are converted into a text for the SQL query.
The following options are available:
Option |
Description |
Language-independent |
The value is directly used (for example, DateTime '01 / 19/2012 21:00:00 '; number: 1.1) This can be used for numbers in general. |
System language |
The value is converted to the format of the system language. This setting can be used with access database timestamps because the driver requires the system format, regardless of the language of the application |
Application language |
The value is converted into the format of the set language in SimAssist (as before) |
The default value for the output format is Language independent
|
Information For previous projects using variables with the type number or DateTime: •Old projects are upwards compatible , so they can be loaded with the new version. The output format is set to the default value Language-independent. •New projects are downwards compatible, so they can be loaded again with an old version. The output format is ignored. |
© SimPlan AG - Hanau District Court, Commercial Register (Part B) 6845 - info@simplan.de - www.simplan.de/en