Contents
1.4 The View Tab and Favorites
3.2 How to Customize the Functional Scope
3.3 How to Position the Quick Access Toolbar
The main menu is the superordinate administrative and management element of SimAssist. It is divided into two interaction tabs: Home and View.
All the menu elements and areas and their functions are described below. Figure 1 shows the Home tab, which is the main menu area, containing the most frequently required features.

Figure 1 - Main menu: Home tab
Element |
Function |
New |
Creates a new project. |
Open |
Opens an existing project. |
Close |
Closes the current project. |
Save |
Saves the current project. |
Save as |
Saves the current project with a new name. |
Export |
Opens a drop down where you can select whether the current project should be saved as *.SIMASSIST file or as ZIP archive |
Properties |
Calls the project properties dialog. |
Options |
Opens the settings |
User Management |
Opens the User Management window (available only if enabled in the options) |
Logfile |
Opens the log file |
Info |
Opens the info dialog box (shows SimAssist version and loaded plug-ins) |
Help |
Opens the SimAssist help file |
Administration |
Opens the plug-in administration function |
Upgrade |
Opens the Plug-In Upgrade dialog box for upgrading the software and plug-ins |
Refresh Project |
Restarts the calculations in the entire project |
Refresh |
Restarts the calculations in the plug-in or folder currently selected |
Clicking the Info button opens the Info dialog shown in Figure 2. Information about the version of SimAssist used and the plug-ins loaded are displayed here.

Figure 2 - Info dialog
As SimAssist has a modular structure and is not just limited to the default plug-ins, plug-ins and modules that do not form part of the standard scope of the application can also be integrated.
For example, plug-ins that have been created by third-party suppliers via a developer license.
This general SimAssist help documentation does not include separate chapters for such plug-ins, rather they must provide their own, separate help files.
In order to also be able to call these help files while working with SimAssist, SimAssist provides a function for selecting them, which you can access by choosing the Help button,
where the software recognizes that the plug-in currently enabled does not belong to the standard scope of the application. Figure 3 shows the relevant selection.
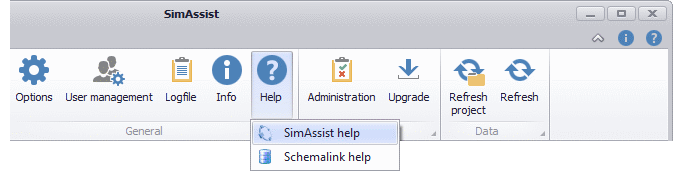
Figure 3 - Help files selection function
1.4 The View Tab and Favorites
The View area is divided into 4 categories. The Projects category offers the possibility to switch between multiple, open projects. Figures 5 shows the corresponding button drop down when 2 projects are open.
Figure 4 - View Tab |
Figure 5 - Switching Projects |
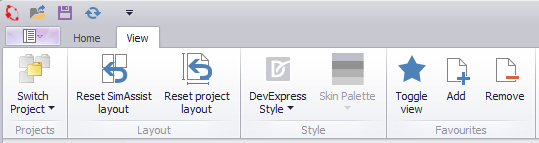

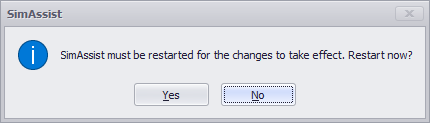
In the Layout category, the two buttons Reset SimAssist layout and Reset project layout shown in Figures 6 and 7 can be used to reset the SimAssist layout or the project layout.
Both actions require a restart of SimAssist. This is automatically displayed by a dialog as soon as one of the two buttons has been clicked (see Figure 8).
Figure 6 - Reset SimAssist Layout |
Figure 7 - Reset Project Layout |
Figure 8 - Restart Dialog |


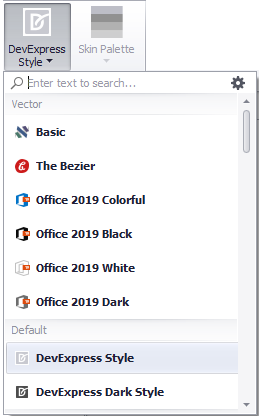
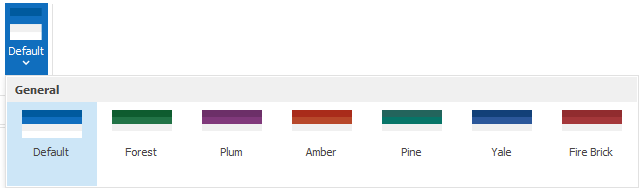
In the category Style you can choose between different skins. The default setting is set to DevExpress Style.
If it is possible in the respective skin, the desired color palette for the style can be defined via the Skin Palette button.
Figure 9 - Style Button |
Figure 10 - Skin palette for Office 2019 white |
Favorites
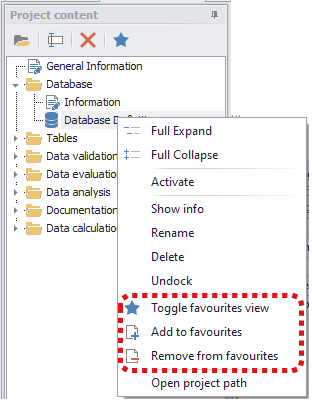
In the Favorites category, plug-ins selected by the user can be added to or removed from the Favorites view (see Figure 10).
This favorite view refers to the view in the project area. Clicking on Toggle View changes the view in this area. All plug-ins that were previously added using the Add button are then displayed in the Favorites view.
In addition, all plug-ins that have been marked as favorites are displayed in bold letters in the "normal" view (Figure 12).
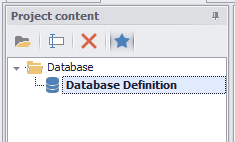
If a plug-in located in a folder is marked as a favorite, both the plug-in and the corresponding folder are displayed in the Favorites view (Figure 13).
Another way to add plug-ins to the Favorites view is via the context menu (right-click) on the respective plug-in (Figure 11).
Figure 10 - View tab |
Figure 11 - Context menu |
Figure 12 - Project content normal |
Figure 13 - Project content Favorites |


In addition to the Home and View tabs, a sidebar menu is also available (see Figure 6).
This menu again contains the most common interaction elements as well as an End function that closes the SimAssist application, and also provides access to the SimAssist welcome page.
Here, you can, for example, view the projects last used and call the SimAssist help documentation.
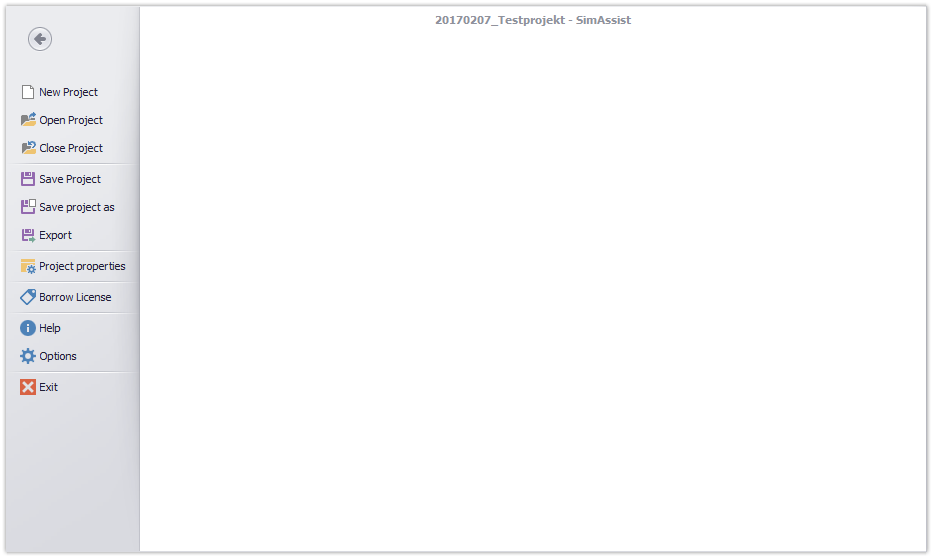
Figure 6 - Sidebar Menu
Clicking the button Borrow License opens up a new Window (see figure 7). Here you can borrow a license (while you're connected to a license server) up to 30 days.
Unused modules can also be checked out by unchecking the Active column (see How to Set Up a License)
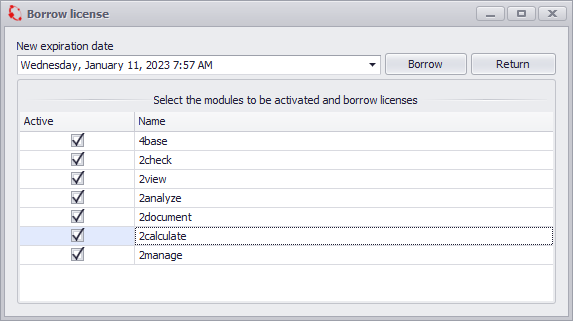
Figure 7 - Borrow License
Quick access icons (see Figure 8) are available for quick, consistent access to the main menu’s key functions – regardless of the area you are currently in – and to configure the position of the ribbon.

Figure 8 - Main menu: Quick access icons
Icon |
Description |
|
Opens an existing project |
|
Saves the current project |
|
Restarts the calculation in each function in the current project |
|
Offers the option of configuring the quick access icons and the position of the ribbon |
|
Opens the info dialog box (shows SimAssist version and loaded plug-ins) |
|
Displays the SimAssist help file (Shortcut: F2) |
3.2 How to Customize the Functional Scope
You can customize the quick access toolbar described above as desired to also display buttons from the main menu in the quick access toolbar.
This means that you can always access your desired functions.
To add icons to the quick access toolbar, all you need to do is right-click the desired button in the main menu and choose Add to Quick Access Toolbar (see Figure 9).

Figure 9 - Add icons to the quick access toolbar
The icon you have added from the main menu will then also appear in the quick access toolbar, where it can also be used (see Figure 10).

Figure 10 - New icon in the quick access toolbar
In the same way as you can add new icons, and therefore interaction options, to the quick access toolbar, you can also remove icons from here.
To do so, simply right-click the icon you wish to remove and then choose Remove from Quick Access Toolbar in the context menu that opens (see Figure 11).

Figure 11 - Remove icons from the quick access toolbar
3.3 How to Position the Quick Access Toolbar
If you wish to do so, you can also position the quick access toolbar described above below the main menu.
If you predominately use your personally customized quick access toolbar while working, you can opt to move this closer to the project window, and thereby closer to the area in which you work with your data.

Figure 12 - Position the quick access toolbar below the main menu
To do so, all you need to do is choose the arrow icon next to the quick access toolbar and select the option Show Quick Access Toolbar Below the Ribbon (see Figure 12).
The toolbar will then be displayed below the main menu (see Figure 13).

Figure 13 - Toolbar below the main menu
© SimPlan AG - Hanau District Court, Commercial Register (Part B) 6845 - info@simplan.de - www.simplan.de/en