Contents
1. Introduction to User Management
7. How to Assign Permissions to Users
8. How to Assign Permissions to Groups
1. Introduction to User Management
SimAssist’s user management function enables you to comfortably manage several users of the software with a User Management component. You can in particular define which users may use which SimAssist modules.
You can also organize users into groups, and thereby specify in detail the functional scope of the software for different groups of people.
Before you can use user management, you first need to enable this in the options. To do so, open the SimAssist options and select the setting True under User Management (see Figure 1).
A further field, the Database Path field, then appears in which you can enter the path to the relevant user management database. When you restart SimAssist, the user management is now available.
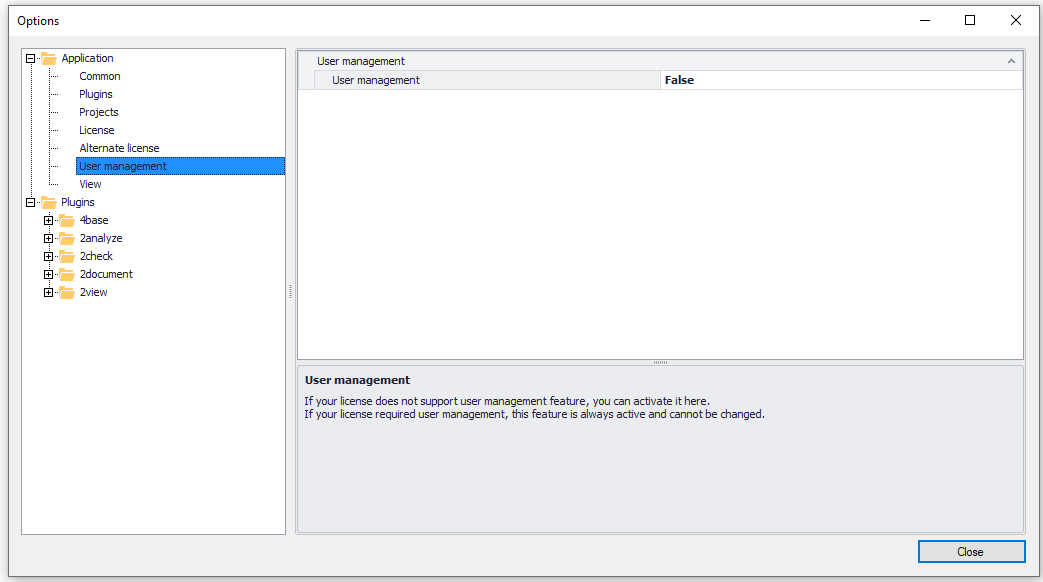
Figure 1 - Enable user management
When you start up SimAssist, a login window now appears from which you can log into user management.
The default user, created automatically by the system, uses admin as both the user name and the password.
With this user, you can now log in and configure user management – create additional users, for example – and assign the relevant rights.
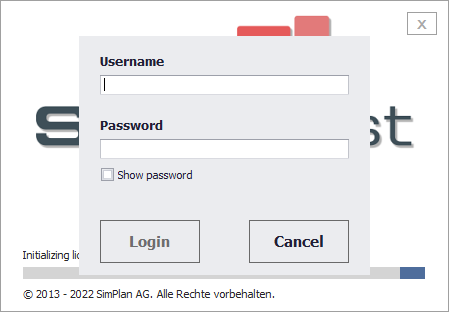
Figure 2 - Log-in via user management
In the main SimAssist menu, you can then open the User Management window (see Figure 3).

Figure 3 - User Management button in the main menu
Figure 4 shows the user management layout. At the top is a tab bar, via which you can access the individual Users, Groups and Permissions tabs.
Below this is the content area, where the actual user administration takes place.
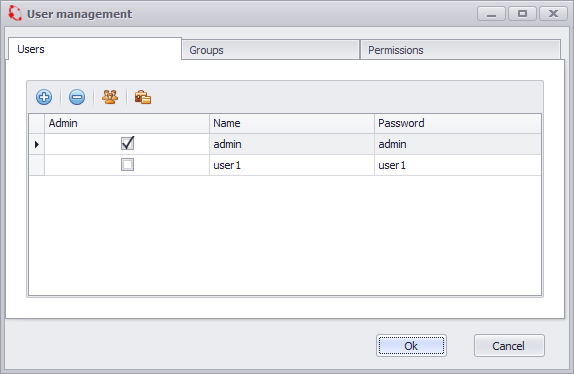
Figure 4 - User management layout
To create a new user, choose the Users tab in the tab bar and choose the Add User button, represented by a plus icon.
In the user management content area, a new area then appears (see Figure 5) in which you can assign the new user a name and password.
You can also choose to assign the new user the status Admin, which means that they will also have all the necessary rights to also access user management and manage users.
The overview of all users shown in Figure 5 lists each user together with the following information: name, password and admin status.
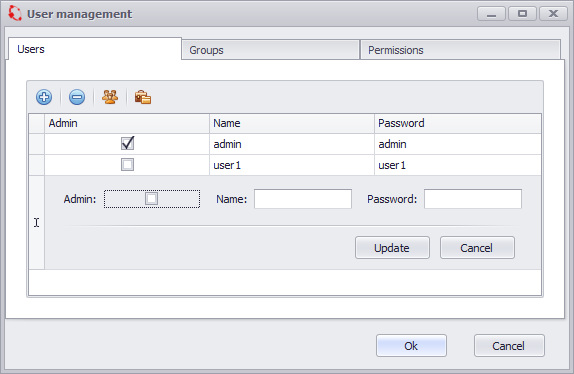
Figure 5 - Add a new user
Once you have created the individual users, you can organize them into different groups, which can later be assigned the desired rights.
To do so, choose the plus icon on the Groups tab to create groups (see Figure 6).
Here too, a new area appears in the content area, in which you can assign the new group a name. Choose Update to finish creating the group.

Figure 6 - Add a new group
You can manage permissions on the Permissions tab. Here, you can create new permissions in the same way as you create users and groups on the Users and Groups tabs (see Figure 7).
The permissions available ensure that users who have been assigned the relevant permissions are able to use the modules managed by the permission in question.
For example, a user in a group that has been assigned the permission pac_sp_4base is entitled to use all 4base module plug-ins.
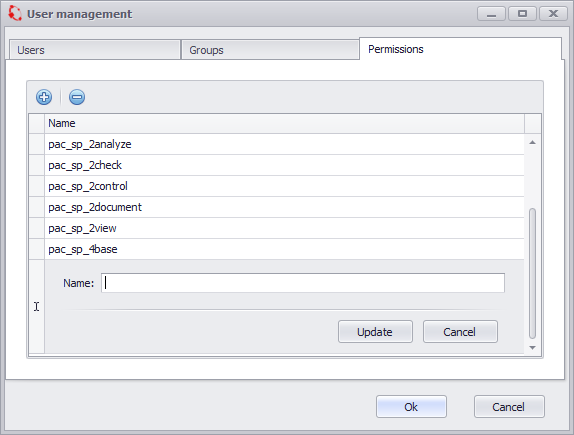
Figure 7 - Add permission
Possible Permissions
Two different types of permission are possible. First, as shown in Figure 7, permissions can be assigned for the SimAssist modules:
Package |
Description |
pac_sp_4base |
Allows use of 4base module plug-ins |
pac_sp_2check |
Allows use of 2check module plug-ins |
pac_sp_2view |
Allows use of 2view module plug-ins |
pac_sp_2analyze |
Allows use of 2analyze module plug-ins |
pac_sp_2document |
Allows use of 2document module plug-ins |
pac_sp_2calculate |
Allows use of 2calculate module plug-ins |
pac_sp_2manage |
Allows use of 2manage module plug-ins |
In addition to the permissions for entire modules, permissions can also be assigned for individual plug-ins:
Package |
Description |
lic_f_sp_base_dbdef |
Allows use of the Database Definition plug-in |
lic_f_sp_base_table |
Allows use of the Table plug-in |
lic_f_sp_base_vgrid |
Allows use of the vertical Table plug-in |
lic_f_sp_base_variables |
Allows use of the Variables plug-in |
lic_f_sp_check_checking |
Allows use of the Checking plug-in |
lic_f_sp_check_sqlquery |
Allows use of the SQL Statements plug-in |
lic_f_sp_simchart |
Allows use of the SimChart plug-in |
lic_f_sp_view_gantt |
Allows use of the SimGantt plug-in |
lic_f_sp_view_simpie |
Allows use of the SimPie plug-in |
lic_f_sp_view_simvis |
Allows use of the SimVis plug-in |
lic_f_sp_analyze_categor |
Allows use of the Categorization plug-in |
lic_f_sp_analyze_confint |
Allows use of the Confidence Interval plug-in |
lic_f_sp_analyze_distfit |
Allows use of the Distribution Fitting plug-in |
lic_f_sp_analyze_pareto |
Allows use of the ABC Analysis plug-in |
lic_f_sp_analyze_matrix |
Allows use of the Correlation matrix plug-in |
lic_f_sp_analyze_python |
Allows use of the Python Statements plug-in |
lic_f_sp_doc_ppt |
Allows use of the PowerPoint plug-in |
lic_f_sp_doc_xls |
Allows use of the Excel plug-in |
lic_f_sp_doc_simnote |
Allows use of the SimNote plug-in |
lic_f_sp_doc_reporting |
Allows use of the Reporting plug-in |
lic_f_sp_calc_monorail |
Allows use of the Monorail plug-in |
lic_f_sp_calc_sorter |
Allows use of the Sorter plug-in |
lic_f_sp_calc_cranes |
Allows use of the Cranes plug-in |
lic_f_sp_manage_simclient |
Allows use of the SimClient plug-in |
lic_f_sp_manage_simproj |
Allows use of the SimProject plug-in |
lic_f_sp_manage_simtarget |
Allows use of the SimTarget plug-in |
Default
Where the default permission is assigned (see Figure 8), the user is permitted to use all modules and plug-ins, that is, in this case, all the software functions are available.
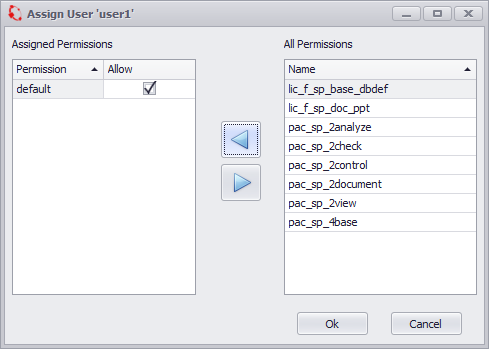
Figure 8 - Default
Individual Permissions
Where individual permissions are assigned (see Figure 9), the user is permitted to use only the relevant modules and plug-ins.
In the figure opposite, the user user1 is entitled to use only the plug-ins for the 2analyze and 2check modules.

Figure 9 - Individual Permissions
Principle of Exclusion
The principle of exclusion comes into play where the default permission has been assigned, as well as additional permissions for modules and/or plug-ins, but these have been disabled (see Figure 10).
This means that in this case the user is permitted to use all modules and plug-ins except those that have been assigned but disabled.
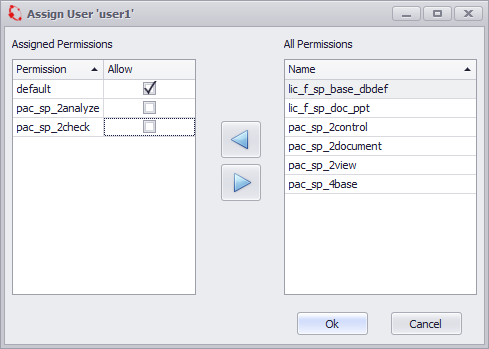
Figure 10 - Principle of exclusion
7. How to Assign Permissions to Users
You can assign one or several permissions directly to a given user.
To do so, choose the Users tab in the tab bar, select the desired user and choose Assign Permissions to User (see icon at the top in Figure 11). The window for assigning permissions then opens.
On the right-hand side of this window, you can select the specific permissions that you want to assign to the user and choose the arrow pointing to the left to assign them to the user.
All permissions assigned to the user are now displayed on the left-hand side of the window. To remove permissions from here, select the relevant permissions and choose the arrow pointing to the right.
Once you are happy with the assignment of permissions, choose OK to conclude the process.

Figure 11 - Assign permissions to users
8. How to Assign Permissions to Groups
In addition to the option of assigning permissions to individual users, you can also assign permissions to groups.
To do so, choose the Groups tab in the tab bar, select the desired group and choose Assign Permissions to Group. The window for assigning permissions then opens.
On the right-hand side of this window, you can select the specific permissions that you want to assign to the group and choose the arrow pointing to the left to assign them to the group.
All permissions assigned to the group are now displayed on the left-hand side of the window. To remove permissions from here, select the relevant permissions and choose the arrow pointing to the right.
Once you are happy with the assignment of permissions, choose OK to conclude the process.
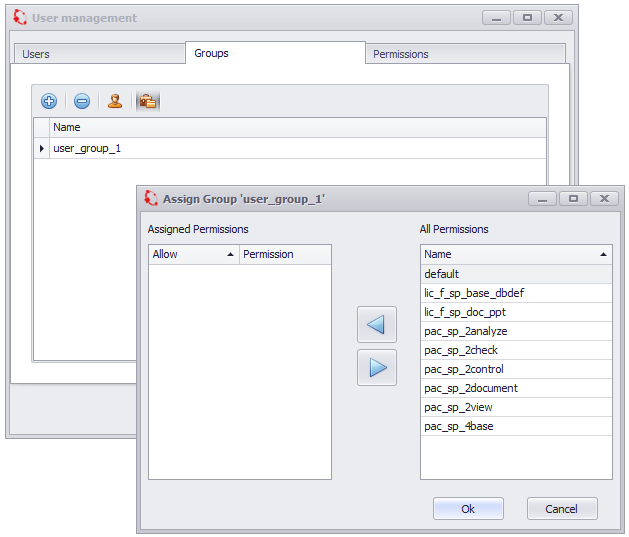
Figure 12 - Assign permissions to groups
As – as already described – you can also assign permissions to groups, and thereby simplify your user administration, you can choose to organize different users into groups.
To do so, choose the Users tab in the tab bar, select the desired user and choose Assign Users to Groups. The window for assigning groups then opens.
On the right-hand side of this window, you can select the desired groups that you want to assign to the user and choose the arrow pointing to the left to assign them to the user.
All groups assigned to the user are now displayed on the left-hand side of the window. To remove groups from here, select the relevant groups and choose the arrow pointing to the right.
Once you are happy with the assignment of groups, choose OK to conclude the process.

Figure 13 - Assign groups
In addition to the option of assigning groups to a user, you can also do the reverse and assign different users to a group.
To do so, choose the Groups tab in the tab bar, select the desired group and choose Assign Users to Group. The window for assigning users then opens.
On the right-hand side of this window, you can select the specific users that you want to assign to the group and choose the arrow pointing to the left to assign them to the group.
All users assigned to the group are now displayed on the left-hand side of the window. To remove users from here, select the relevant users and choose the arrow pointing to the right.
Once you are happy with the assignment of users, choose OK to conclude the process.
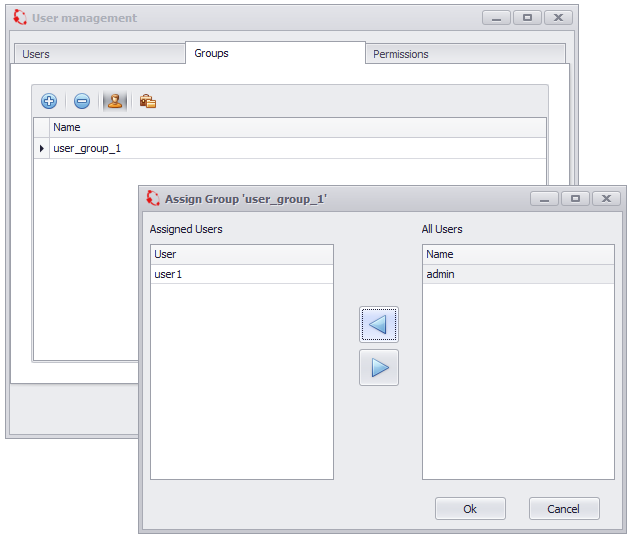
Figure 14 - Assign Users
In user management, you can define exactly which SimAssist functions which user or user group may use.
Figure 15 shows the plug-in library with the full range of functions, that is, with all default modules that are therefore available to the user.
This means that where user management is not enabled, this range of functions is available to all users and is therefore the default setting.
To restrict the range of functions available, please proceed as described in the sections above. Figure 16 shows how user management works.
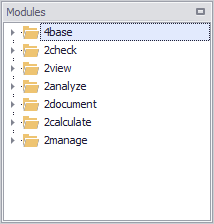
Figure 15 - Comprehensive plug-in library
The user user1 has been assigned, by way of an example, the permissions for the 4base, 2check and 2view modules.
Consequently, the user can – as shown in Figure 16 – access only the relevant modules and their plug-ins; all other plug-ins are unavailable.

Figure 16 - Limited plug-in library
© SimPlan AG - Hanau District Court, Commercial Register (Part B) 6845 - info@simplan.de - www.simplan.de/en