The following comprises instructions for the PowerPoint plug-in.
Contents
1. Introduction to the plug-in
1.3 Position in the Overall Software Package
3.1 How to Select a Presentation
3.3 Sources and interaction area
3.6 Information for working with the plug-in
1. Introduction to the plug-in
The PowerPoint plug-in enables you to add content from other plug-ins to a set of PowerPoint slides, and thereby create a presentation that you can subsequently export.
You can use the PowerPoint plug-in to automatically transfer the content of a number of SimAssist plug-ins to a PowerPoint presentation.
You can also customize the layout of your presentation – you can even use PowerPoint templates.
1.3 Position in the Overall Software Package
The PowerPoint plug-in is part of the 2document module, which also contains the SimNote, Excel and Reporting plug-ins. PowerPoint is available when you license the 2document module for SimAssist.
As PowerPoint is responsible for transferring SimAssist content to a set of slides, it is linked to all plug-ins with content that can be integrated in PowerPoint presentations.
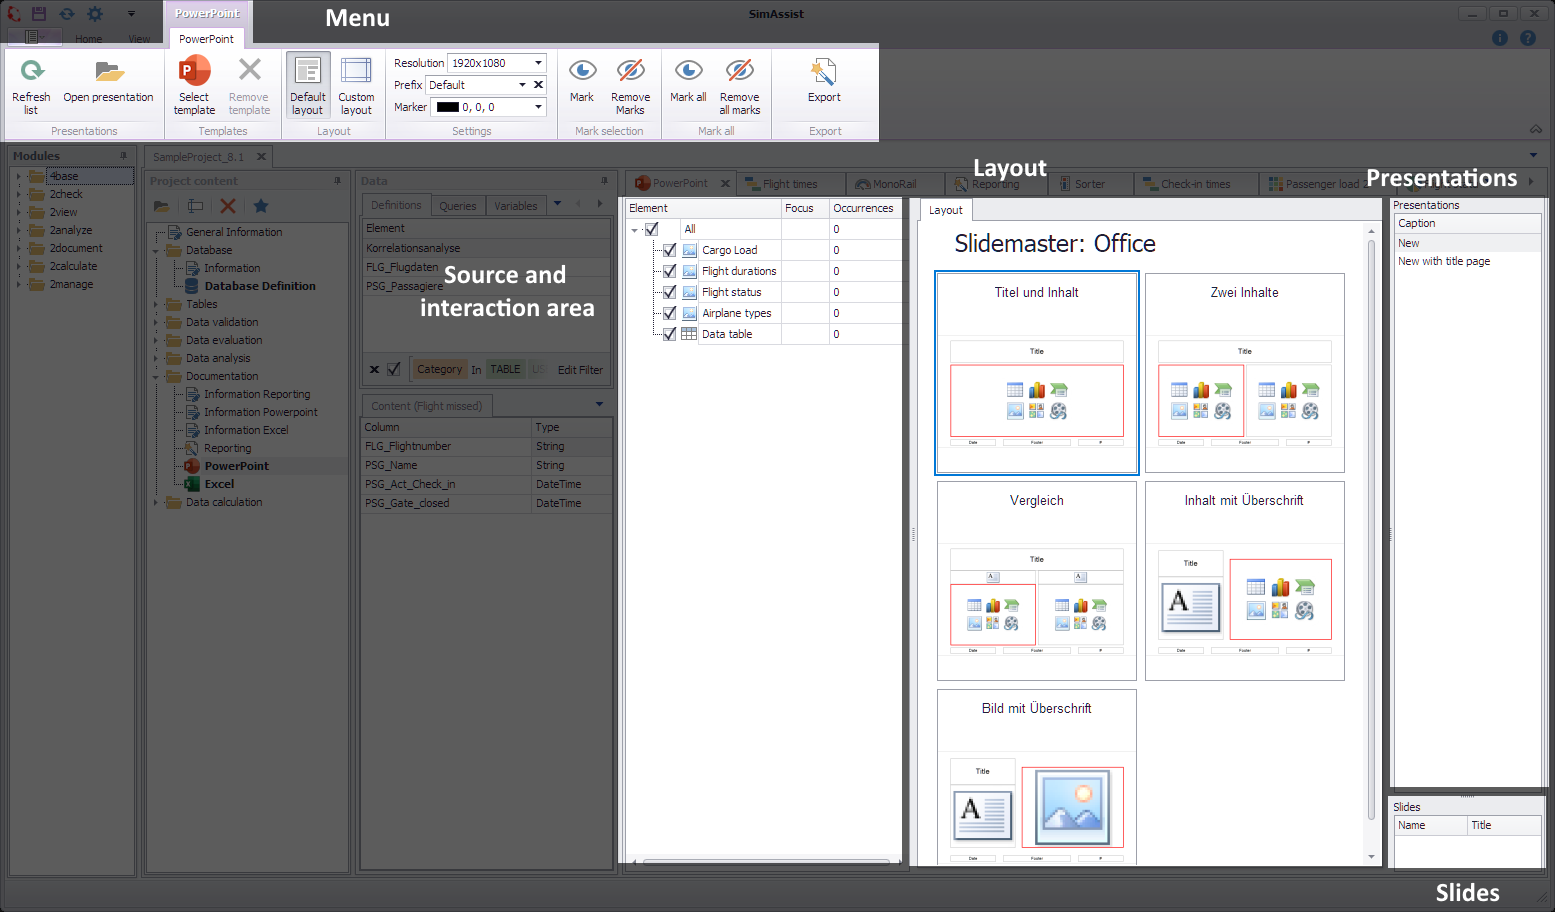
Figure 1 - Layout of the PowerPoint plug-in
The structure of the plug-in PowerPoint has a four-part structure. In the upper area you can find the menu of the plug-in. Here you can load templates or open existing presentations.
Below that is the sources and interaction area of the plug-in. With the help of this area, you can determine which plug-ins should be included as content in the presentation.
On the other hand, you can choose here which of the sources should be exported. A detailed description of the area can be found in chapter Sources and interaction area.
The largest area is the Layout area. Using the layout, you can select from the predefined slide layouts.
Alternatively, it is also possible to determine the individual appearance of the slides (read more in the remainder of this plug-in guide).
In the Presentations section on the right, you can choose to create a new presentation or continue to use one that has already been created.
 s
s
Figure 2 - Menu
The PowerPoint plug-in menu contains all interaction areas, to facilitate use of the plug-in. The menu’s individual buttons and settings options are presented in detail below:
Button |
Description |
|
Refreshes the list of PowerPoint presentations opened. |
|
Opens an existing PowerPoint presentation. |
|
Selects a PowerPoint template for export to a new presentation. |
|
Removes the selected template. |
|
Enables selection of a default layout for the export. |
|
Customize a layout for your presentation. |
|
Enables selection of the screen resolution in which you want to display the presentation. |
|
Allows you to set a prefix, allowing slides to be assigned and easily identified. For example, different sets of images can be defined, each based on the same source elements |
|
Here you can set the color of the marker |
|
Marks the elements selected in the sources in the selected PowerPoint presentation with the color set in the Marker field |
|
Removes the set markers of the selected items in the PowerPoint presentation |
|
Selects all slides of the selected PowerPoint presentation, regardless of the selection in the source area |
|
Removes all markers of the selected PowerPoint presentation |
|
Exports the elements selected to a PowerPoint presentation. |


In the Options in the main menu of SimAssist you can make plug-in specific settings. The following options are available for the PowerPoint plug-in:
Option |
Description |
PowerPoint |
|
Resolution |
The number of pixels and aspect ratio of the created PowerPoint presentation. |
Template |
The default template from which the PowerPoint presentation will be created. |
3.1 How to Select a Presentation
As a first step, we recommend that you select the desired presentation type.
You can select a new presentation with no title page, a new presentation with a title page or an existing, previously created or loaded presentation.
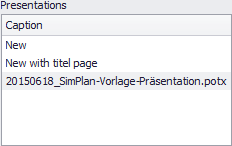
You make your relevant selection in the Presentations area in the plug-in window (see Figure 3).
If you want to use an existing presentation, please choose the Open Presentation button in the plug-in menu (see image opposite).
The loaded presentation is now available in the Presentations area (see image below; here, as an example, 20150618_SimPlan-Vorlage-Präsentation.potx) and can be selected as the target presentation for the export.
Figure 3 - Select presentation type |
|
To add data or images to your presentation, all you need to do is move the plug-in containing the desired content from the project window to the PowerPoint plug-in’s Sources area using Drag&Drop (see Figure 4).
Alternatively, starting with SimAssist version 10.1, you can drag the desired plug-in or folder directly onto the PowerPoint plug-in. This process also adds the plug-ins as sources.
In the Sources area, you can then select or deselect the relevant check boxes to enable or disable the content.
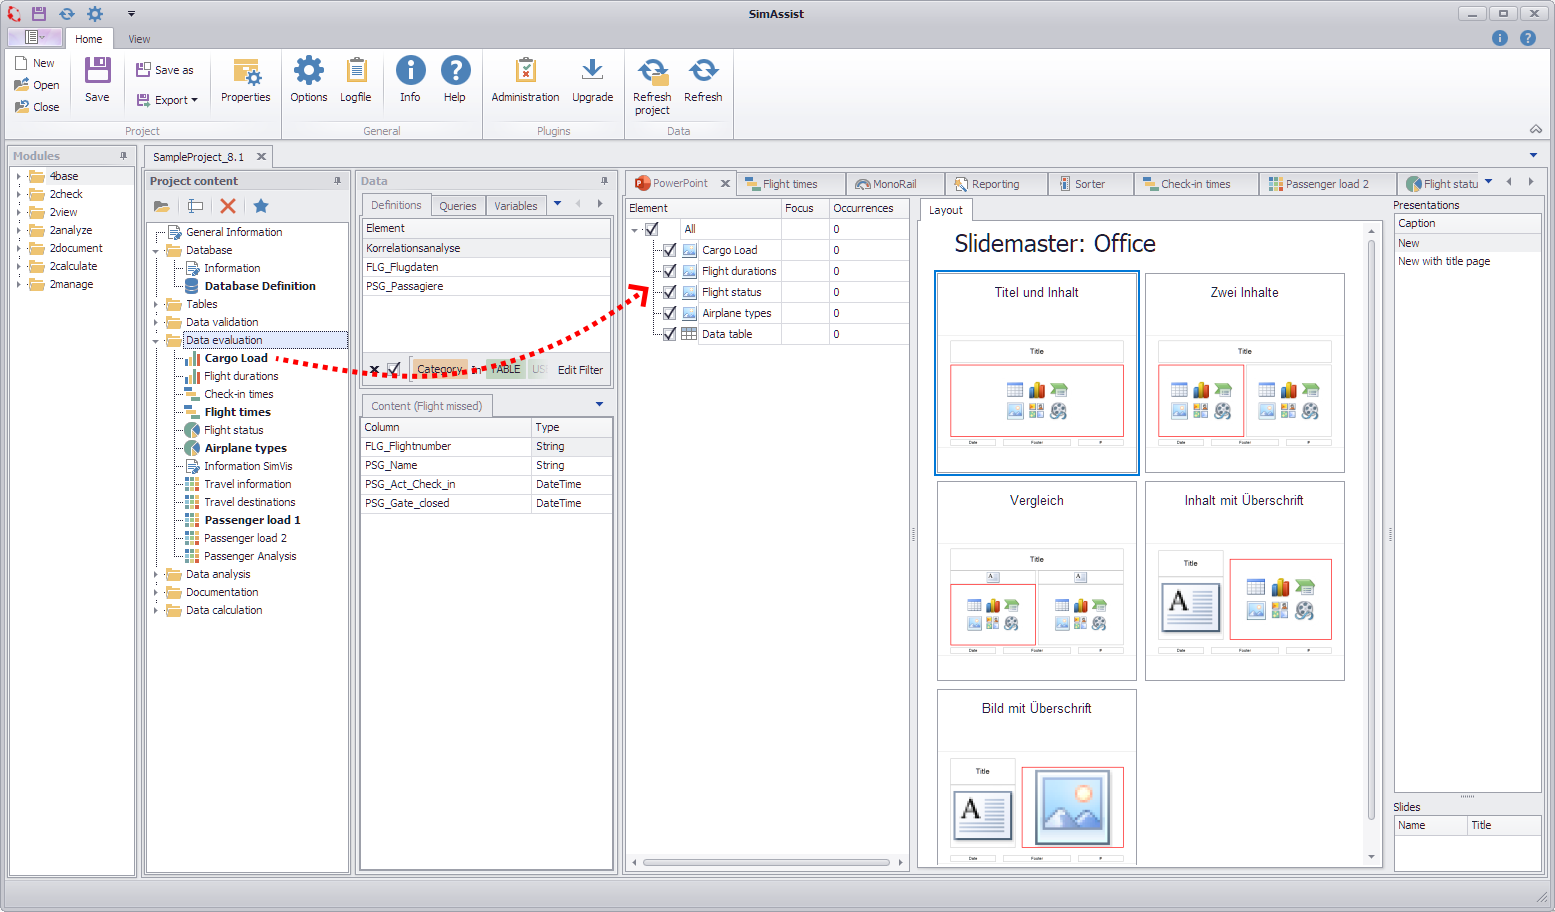
Figure 4 - Add Content
|
Export of tables from SimAssist version 5.1: The procedure for exporting tables is the same as for exporting created graphics: A plug-in that provides table data can be dragged into the PowerPoint plug-in. The table is exported to PowerPoint as an Excel object, analogous to the manual insertion of an Excel table in PowerPoint. The export is also subject to the same restrictions: •Number of visible rows and columns is limited and depends on their width/height. •However, all data is exported and can be viewed by double-clicking on the object.
If the structure or the number of rows/columns changes, the existing table in PowerPoint defines the target area in which the new table is inserted. |
3.3 Sources and interaction area
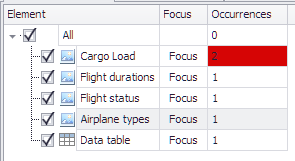
1.The Element column lists the names of the added sources.
2.The Focus column is filled as soon as a slide appears several times (at least 1x) in the PowerPoint presentation.
3.By clicking on the Focus button in the respective line, the corresponding element is focused in the PowerPoint presentation.
4.The Occurrences column shows how many times the item appears in the PowerPoint presentation.

Figure 5 - Sources and interaction area
Furthermore, it is possible to select several elements from the source area with pressed CTRL key and change their position by means of Drag&Drop.
The arrow on the left edge points to the point at which the elements are deposited (see Figure 6.1).
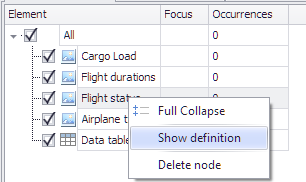
By right-clicking on a corresponding element, it can be deleted or you can switch to its definition (Plug-ins) (see Figure 6.2).
If a slide containing an image exported from SimAssist is copied and pasted using the keyboard shortcut [CTRL + C] + [CTRL + V] in an already exported PowerPoint presentation,
this now duplicated slide / image is shown in the corresponding cell in the occurrence column (see Figure 6.3).
Figure 6.1 - Multi select and move |
Figure 6.2 - Remove element |
Figure 6.3 - Occurrences info |

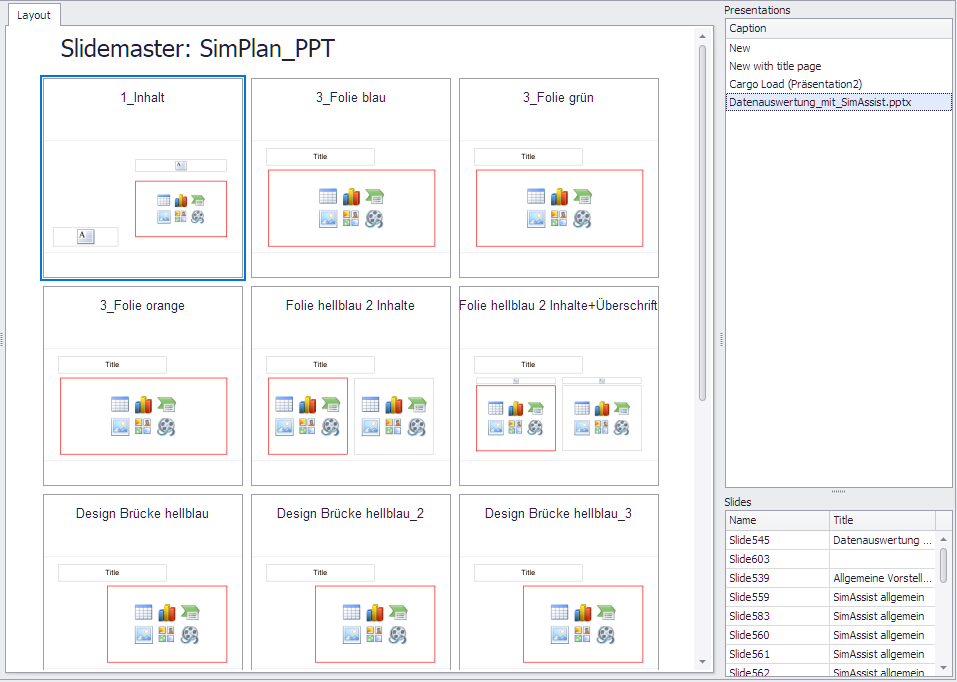
There are two ways to set the layout for your presentation. First, you can use an external PowerPoint template - the Select template button is available in the Plug-in menu.
Once you have selected the external template and set the content you want to present in the Sources area, click Export to start building the PowerPoint presentation.
The content and slides are automatically arranged and designed according to the layout of your template.
The view in the Layout area adapts to the slide master of the specified template (see Figure 7).
If several content areas are present in a layout template, these can also be selected by clicking again with the mouse.
 -
-
Figure 7 - Layout of a template
The second option is to use predefined layouts. To do this, you can select one of the standard layouts in the Layout area.
To use the default slide layouts, either New or New with Title Page must be selected in the Presentations area and no template must be loaded (see Figure 8).
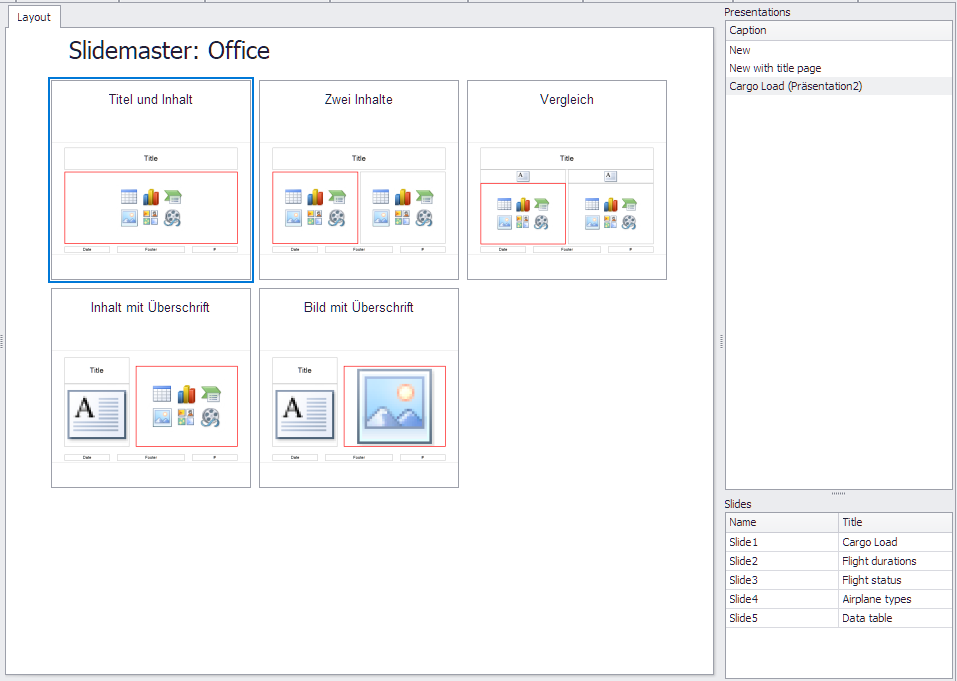
Figure 8 - Default layout
The preview images help give you an idea of the layouts and consequently find the right one for your presentation.
Button |
Description |
|
To display the predefined layouts, choose the Default Layout button in the plug-in menu: |
|
If you do not want to use any of the default layouts, you can also choose to create a customized layout. To access the settings for this, all you need to do is choose the Custom Layout button in the plug-in menu |
You can now define both the margins and scale and make the relevant settings to align the layout horizontally and/or vertically. You can also see a preview, showing your content in your defined layout.

Figure 9 - Custom layout
Once all the necessary settings have been made, you can choose the Export button to transfer presentations to a Microsoft PowerPoint document.
The PowerPoint software then opens, which contains your finished presentation. You can now save the presentation; this concludes the export process.
3.6 Information for working with the plug-in
|
Information: The assignment from slide to slide is done automatically by the algorithm. By clicking on the Refresh list button in the menu next to the list of presentations in the Presentations area, also the list of slides and images in the sources and interaction area is updated. When exporting, each image gets a unique ID. If an image has been copied by the user in the exported presentation, both images will be found and updated by the algorithm. Images from projects that include an older version of the PowerPoint plug-in will be assigned the newly generated IDs when opened with the updated plug-in version. |
|
Information: To find the desired element quickly in the corresponding presentation, the Focus button can be used in the Focus column Here you must pay attention to the respective selection of the prefix. In order to make the search even easier, the matching slides can also be marked with different colors via the marking function. |
|
Information: The title of the PowerPoint slide corresponds to the title in the respective SimAssist plug-in, which is linked as the source in the PowerPoint plug-in. Once exported, titles can only be edited in PowerPoint. |
After you have created a presentation and it is still open in Microsoft PowerPoint, you can configure the following settings:
Setting |
Description |
Export |
Indicates whether or not the corresponding item should be exported to PowerPoint. By unchecking this box, you can remove previously added images from the presentation. |
Mark |
Marks the elements selected in the source area in the corresponding presentation in the color defined in the Marker section. |
Delete marks |
Removes the markers from the items selected in the source area from the PowerPoint presentation. |
Mark all |
Marks all elements in the corresponding color (Marker section), regardless of the selection in the source area. |
Delete all marks |
Removes all markers from the PowerPoint presentation, regardless of the selection in the source area. |
Figure 10 shows how the two elements SimChart_1 and SimPie_1 were marked in the source area. The color of the marker is set to Red.
Subsequently, the previously exported presentation must be selected in the Presentations area and the Mark button must be pressed.

Figure 10 - Mark slides
Figure 11 shows the slides that are now marked in the corresponding presentation (here Presentation (1)).

Figure 11 - Mark slides - result
Example 2:
With the button Prefix several versions of an export can be created in the same presentation. The default value is Default.
In this example, two plug-in instances are used as the source for the PowerPoint plug-in (SimChart_1 and SimChart_2)
These are first exported to a new presentation, with the default prefix Default (see Figure 12).
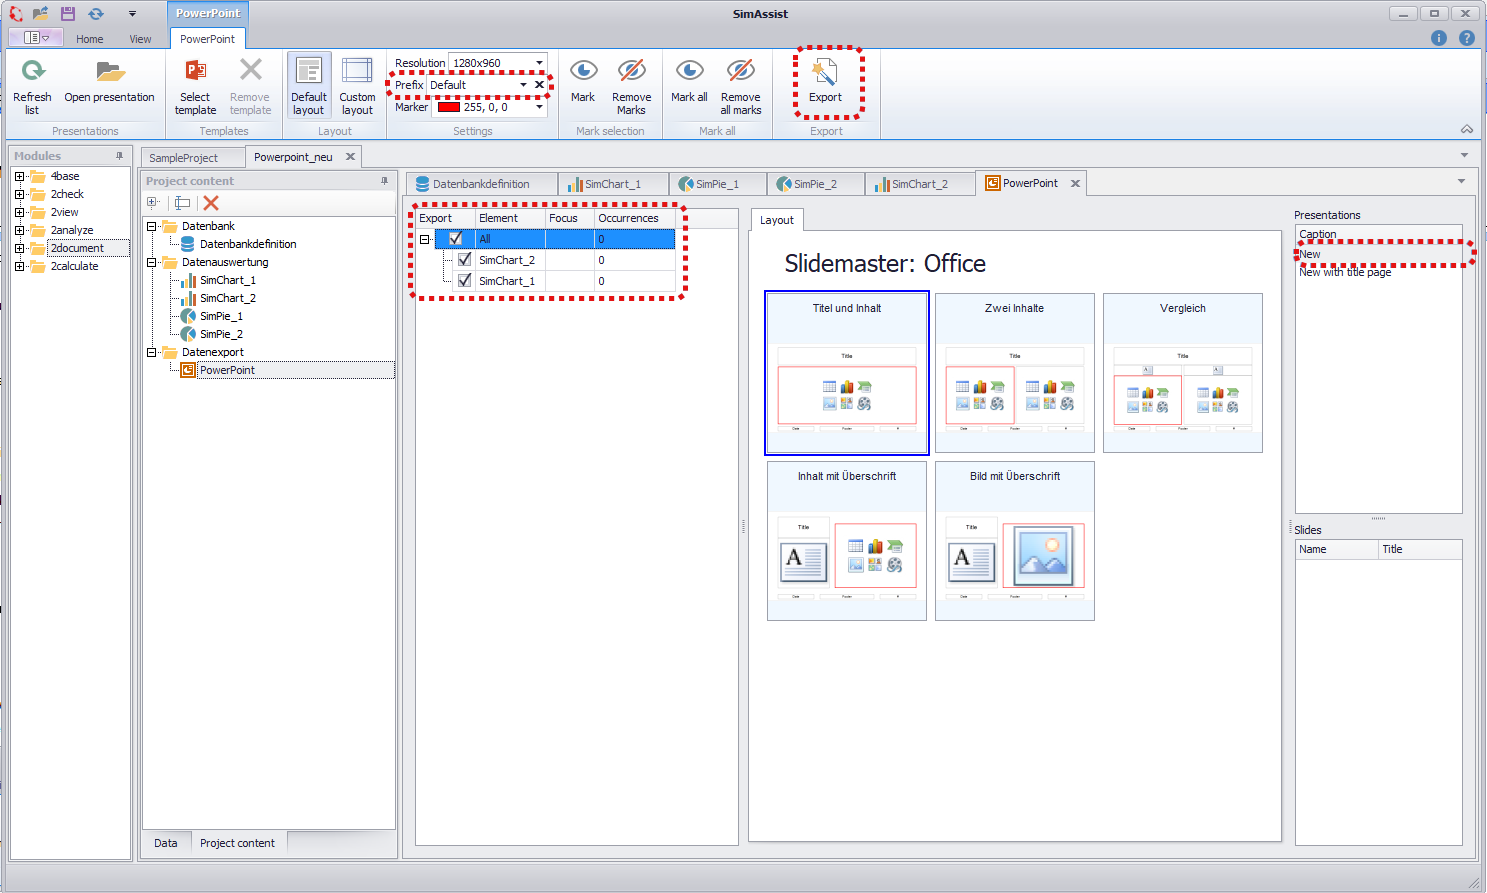
Figure 12 - Default prefix
Figure 13 shows the result of the export. If the selection area is now displayed in the newly created presentation, the prefix can be found there.
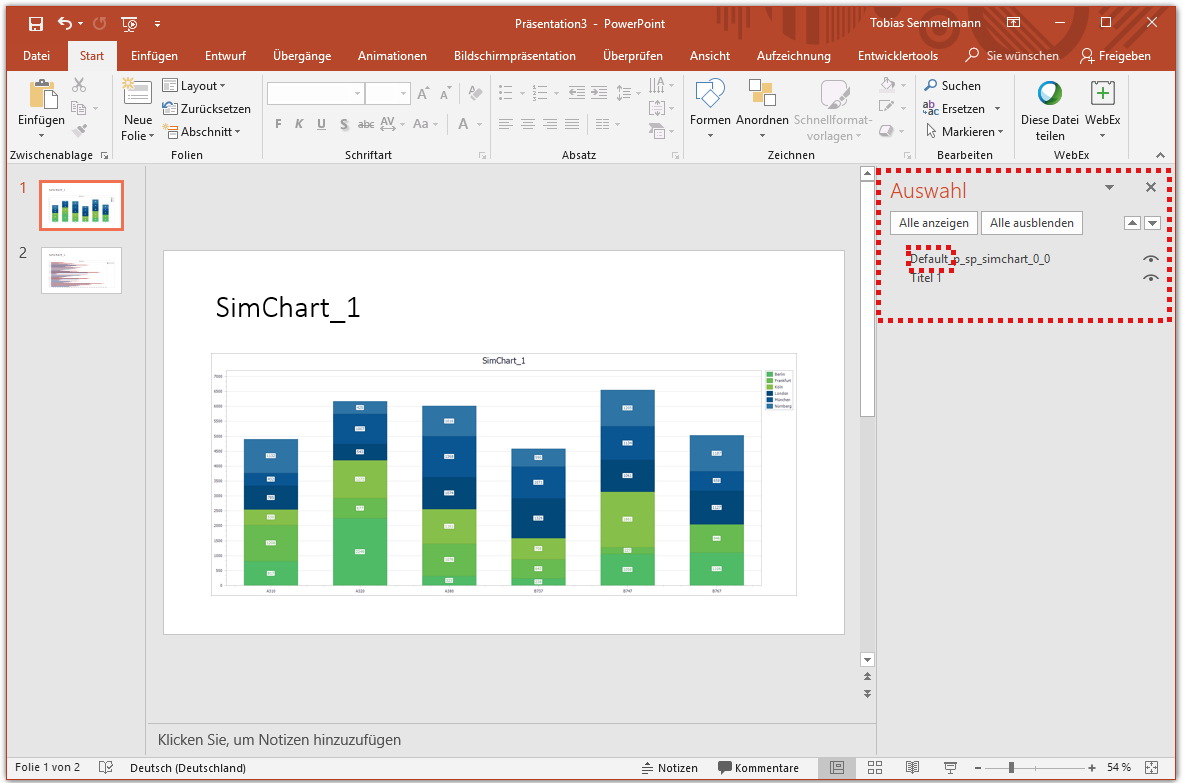
Figure 13 - Prefix in presentation
Now in the Prefix section of the plug-in, it will be renamed to Exp_2 to create a new variant of the slides on export (see Figure 14).
The drop-down box allows you to switch between the prefixes already in use.
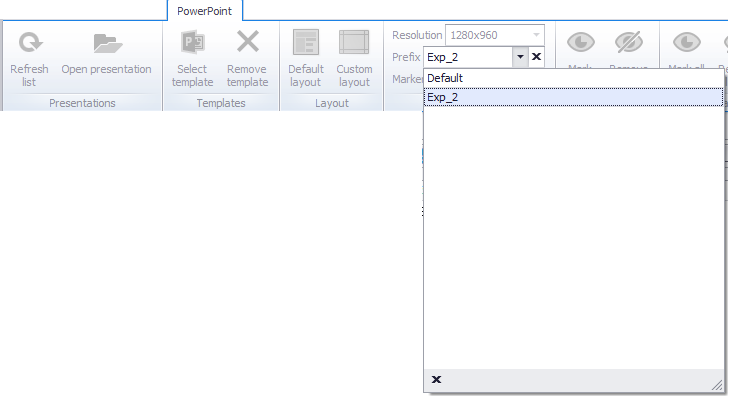
Figure 14 - Create a new prefix
Subsequent export to the existing presentation (Presentation 10) will create two new slides with identical contents, but different prefixes, in addition to the existing slides.
These can be viewed again through the selection area of the presentation (see Figure 15).
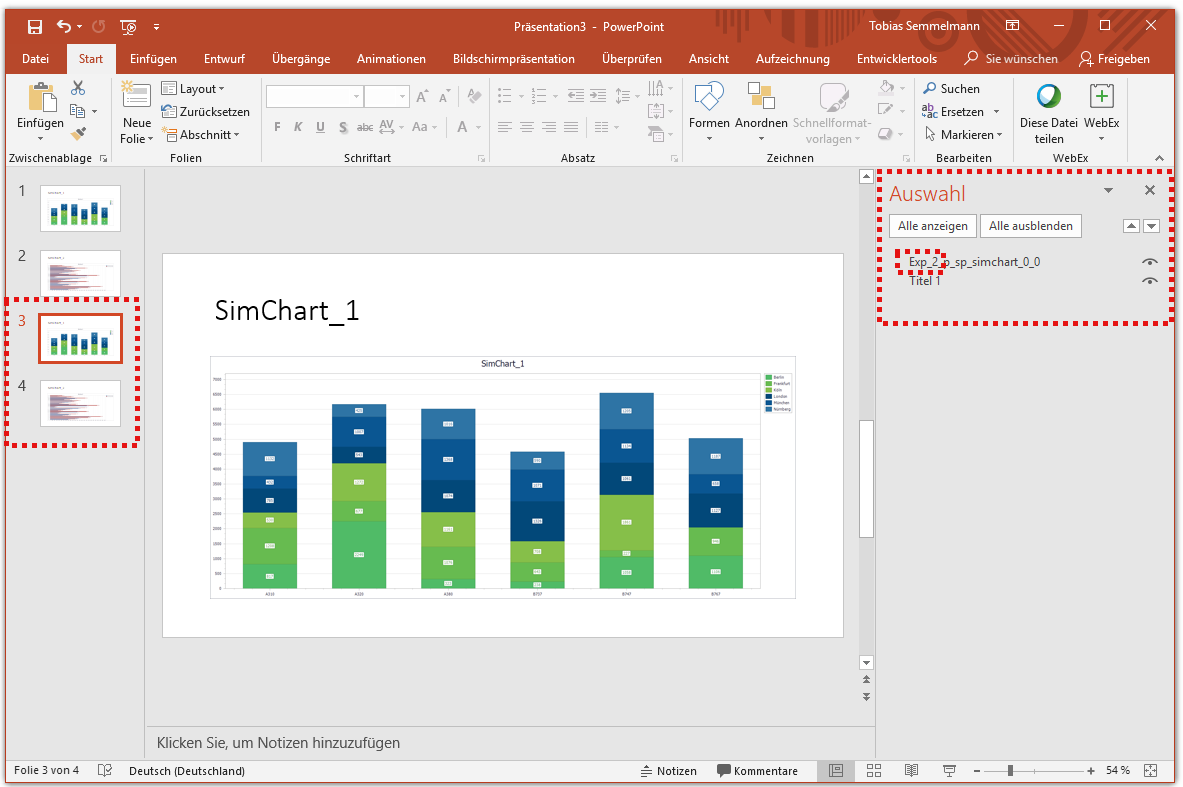
Figure 15 - New prefix in presentation
© SimPlan AG - Hanau District Court, Commercial Register (Part B) 6845 - info@simplan.de - www.simplan.de/en